Installing Flush Mount Ceiling Fan

How To Install A Hunter Ceiling Fan 2xxxx Series Models Hunter Ceiling Fans Ceiling Fan Installation Ceiling Fan Wiring

Overstock Com Online Shopping Bedding Furniture Electronics Jewelry Clothing More Brushed Nickel Ceiling Fan Ceiling Fan Ceiling Fan With Light

Pin By Ashlynn Dickey On Ashlynn Ceiling Fan Flush Mount Ceiling Fan Ceiling Installation

Hunter Romulus 54 In Noble Bronze Led Indoor Flush Mount Smart Ceiling Fan With Light And Remote 5 Blade Lowes Com In 2021 Ceiling Fan With Light Ceiling Fan Fan Light

Pin On Fans

Can We Install Ceiling Fan On False Ceiling Ceiling Medallions Ceiling Fan Ceiling Fan Installation

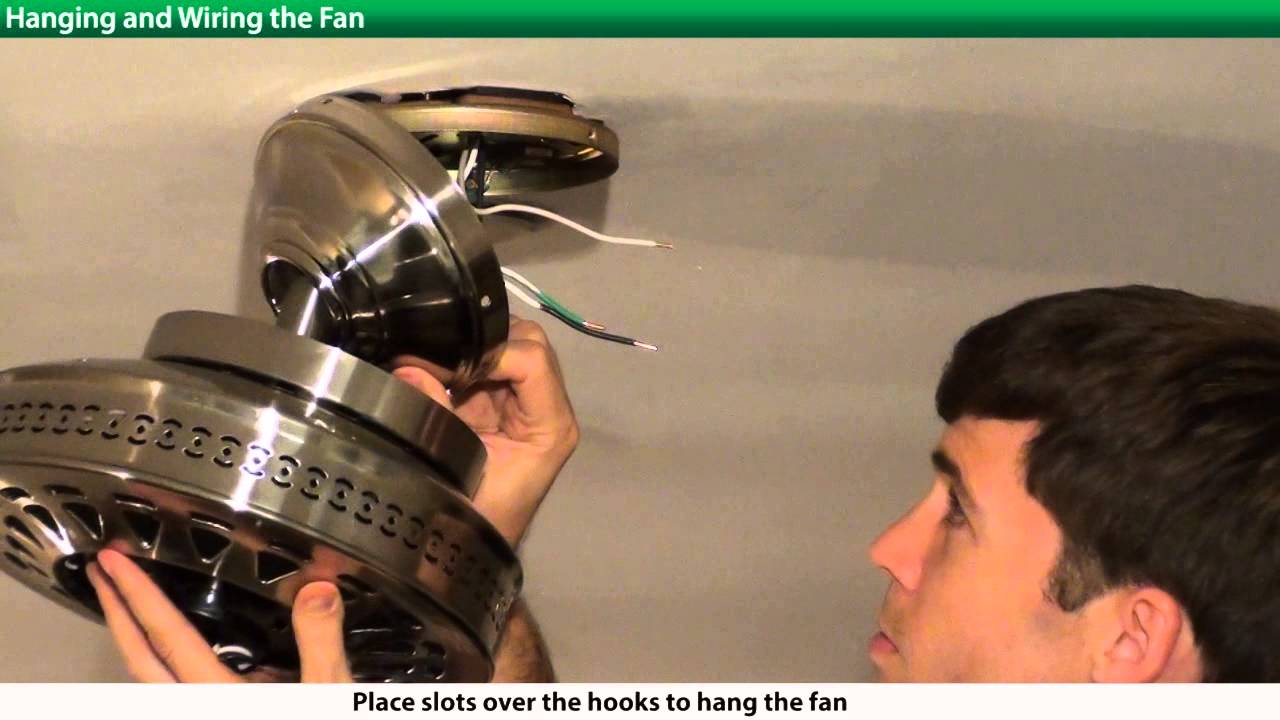
From the top of the motor housing of fan remove the larger screws and lock washers.
Installing flush mount ceiling fan. In This ArticleThe mounting strap and threaded tube are set to the proper height and installed. Secure the canopy to the housing using the same screws. Installing a flush mount light in place of a ceiling fan requires changing the electrical box.
It is also useful if the ceiling fan has a light fixture that would hang down too low from beneath the fan. Although a ceiling fan is a low-energy way to cool the home the body of the ceiling fan takes up a lot of room. This can make attaching a flush mount fan less of a process in the long run.
Connect the white wire from the fan and white wire from the receiver marked To Motor with a wire nut. Please do not hesitate to call 1-866-203-5392 or email one of our customer service representatives in regards to this subject and inquire into available adapters to solve this problem. FLUSH MOUNT APPLICATIONS MUST ALWAYS BE INSTALLED WITH HEATERS HORIZONTAL TO THE FLOOR ON A FLAT NON-SLOPED CEILING.
Firstly some people ask can you make any ceiling fan flush mount The answer is no. It may well also have a hook. For a close-to-ceiling mounting youll need to have a mounting bracket that is designed to bear the weight of the ceiling fan without a DIY modification to the installation.
Use the same screws to secure the canopy to the housing. Connect the mounting bracket towards the box utilizing the screws offered and pull the wires with the box through the hole within the bracket. Install the heater heater must face horizontal to the floor and adjust the tabs to set the heater flush with finished ceiling.
Installing A Flush-MountCeiling Light Fixture. Before you begin your Hunter ceiling fan installation project follow these steps to ensure a smooth and safe process. Attach the bulb-shape fitting at the top of the downrod to the mounting bracket on the ceiling.

Here Are Some Various Reasons To Add A Fan To Your Room First Off If You Install A Ceiling Fan It Helps To Keep Your Ho Ceiling Fan Modern Ceiling Fan

Hinkley Hover Led Flushmount Ceiling Fan Blade Color Koa In 2021 Ceiling Fan Ceiling Fan Size Ceiling Fan Blades

Hunter Parmer 46 In Led Indoor Fresh White Flush Mount Ceiling Fan With Light Kit 59587 The Home Depot In 2021 Flush Mount Ceiling Fan Ceiling Fan Ceiling Fan With Light

44 Concept Ii Brushed Steel Flushmount Led Ceiling Fan 19w17 Lamps Plus Ceiling Fan Flush Mount Ceiling Fan Hugger Ceiling Fan

Shop Hunter Louden 46 In Brushed Nickel Flush Mount Indoor Residential Ceiling Fan Standard Included Flush Mount Ceiling Fan Ceiling Fan With Light Fan Light

48 Ceiling Fan From The Volos Collection In Matte White Finish In 2021 Flush Mount Ceiling Fan Led Ceiling Fan White Ceiling Fan

52 Magonia Brushed Nickel Pull Chain Ceiling Fan In 2021 Ceiling Fan With Light Ceiling Fan Traditional Ceiling Fans

44 Concept Ii Brushed Steel Flushmount Led Ceiling Fan 19w17 Lamps Plus In 2021 Led Ceiling Fan Ceiling Fan Ceiling Fan With Light

Harbor Breeze Sailstream 44 In Bright White Led Indoor Flush Mount Ceiling Fan With Light And Remote 3 Blade Lowes Com Flush Mount Ceiling Fan Ceiling Fan With Light Fan Light

Hugger 52 In Led Indoor Black Ceiling Fan With Light Kit Al383led Bk The Home Depot Black Ceiling Fan Ceiling Fan Flush Mount Ceiling Fan

Advocate Flush Mount Ceiling Fan In 2021 Ceiling Fan Flush Mount Ceiling Fan Hunter Ceiling Fans

Romulus Low Profile With Led54 Inch Ceiling Fan With Light Ceiling Fan Fan Light

Harbor Breeze Mayfield 44 In Brushed Nickel Flush Mount Indoor Residential Ceiling Fa Flush Mount Ceiling Fan Ceiling Fan With Light Brushed Nickel Ceiling Fan
Harbor Breeze Armitage 52 In Bronze Led Indoor Flush Mount Ceiling Fan With Light 5 Blade Lowes Com In 2021 Flush Mount Ceiling Fan Ceiling Fan With Light Ceiling Fan Light Kit

